Step 1: Set SafeInCloud as the Preferred Autofill Service on device
1. Open device Settings 2. Go to Passwords, passkeys & accounts.
3. Tap the Change button under Preferred service.
4. Select SafeInCloud and confirm the change.
Step 2: Enable the New Autofill Method in Chrome
1. Open Chrome on your Android device.
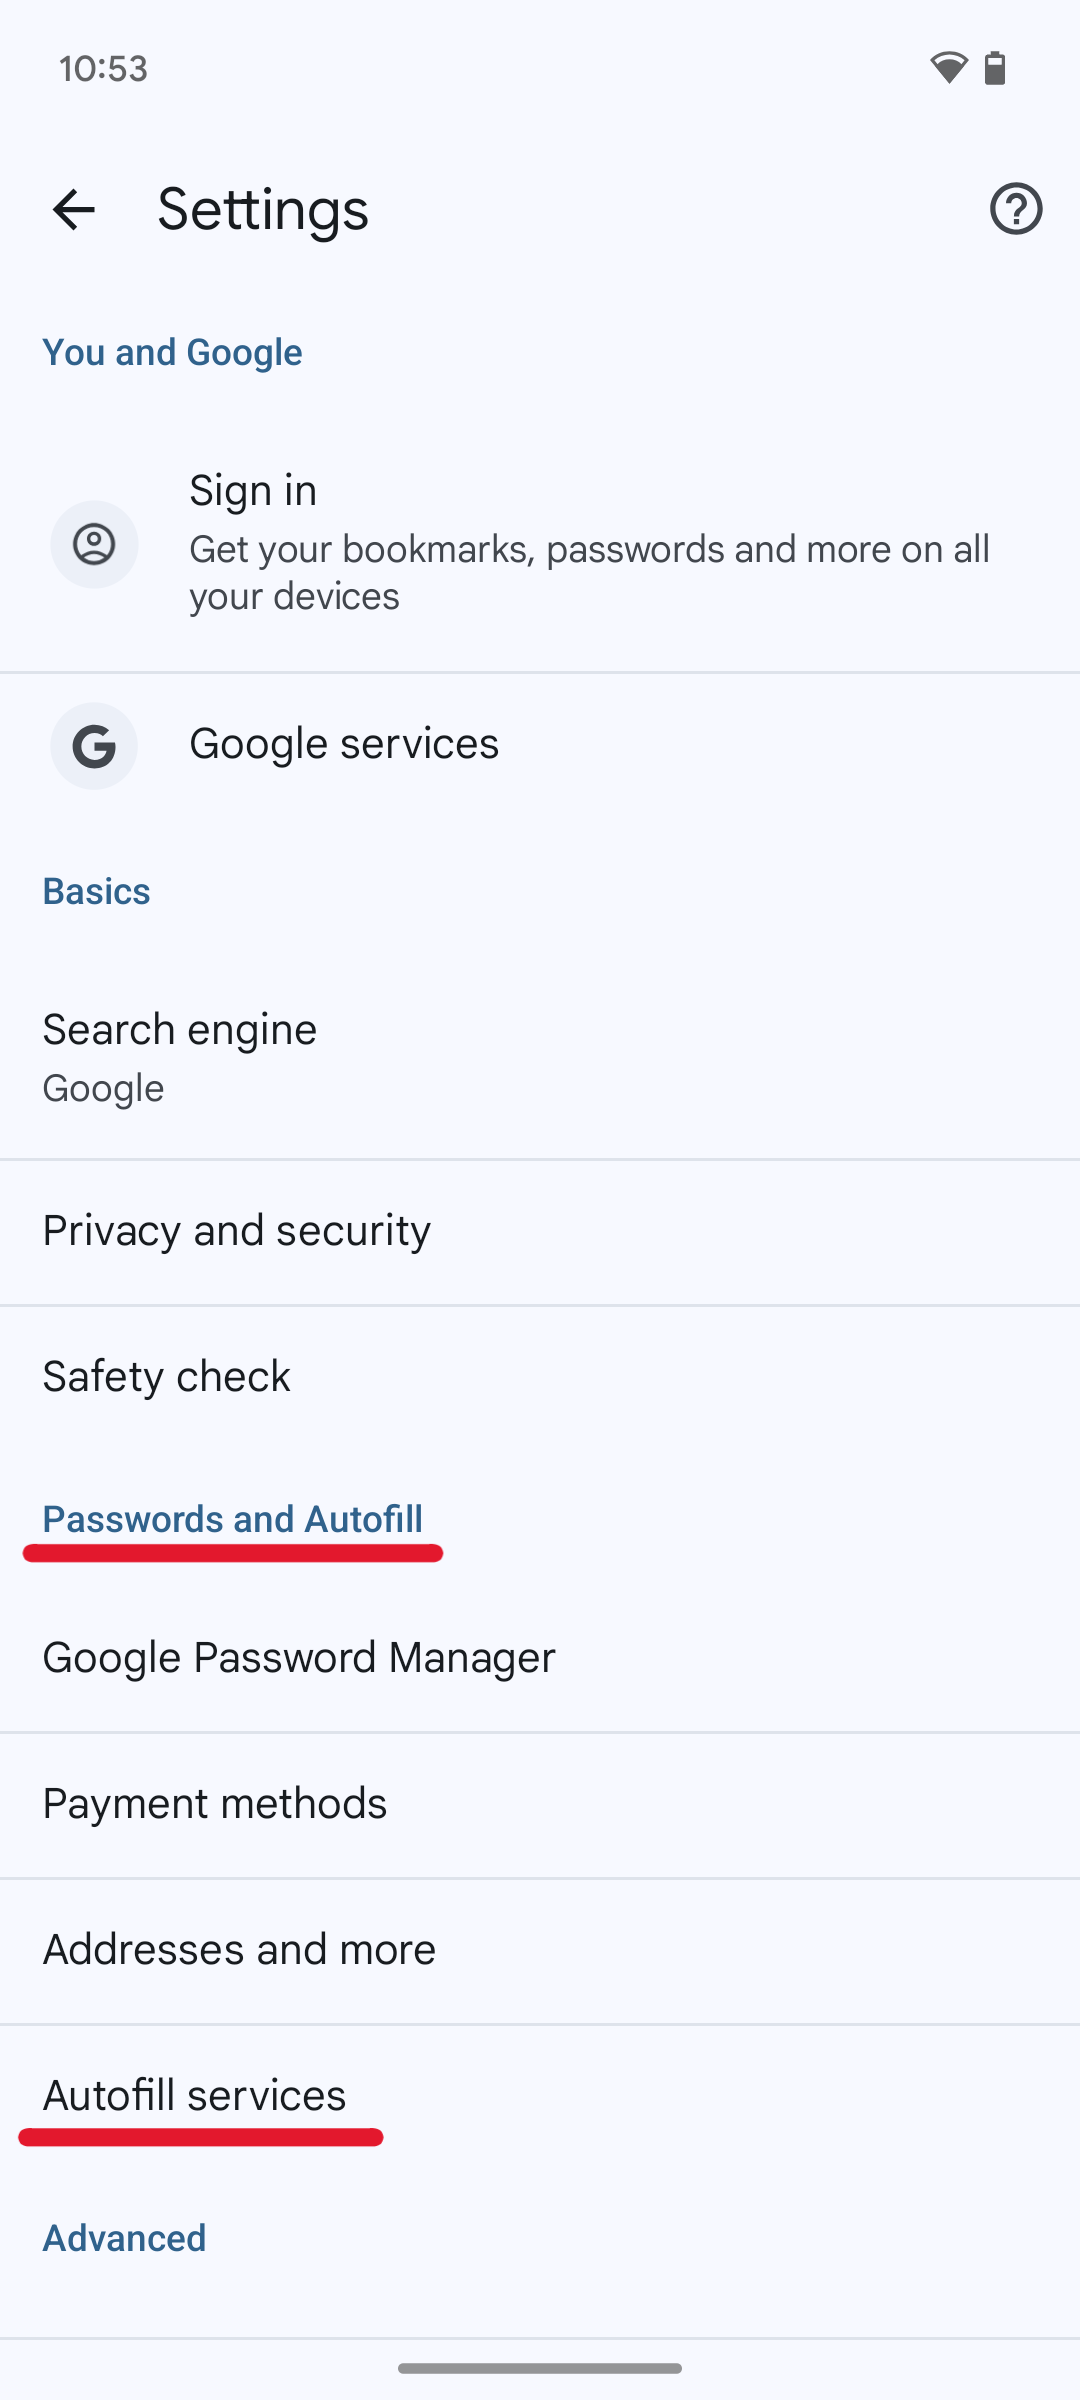
2. Open Chrome Settings and go to Autofill Services.
4. Choose Autofill using another service and confirm the selection.
5. Restart Chrome.
Usage
1. Open in Chrome a website where you want to use autofill.
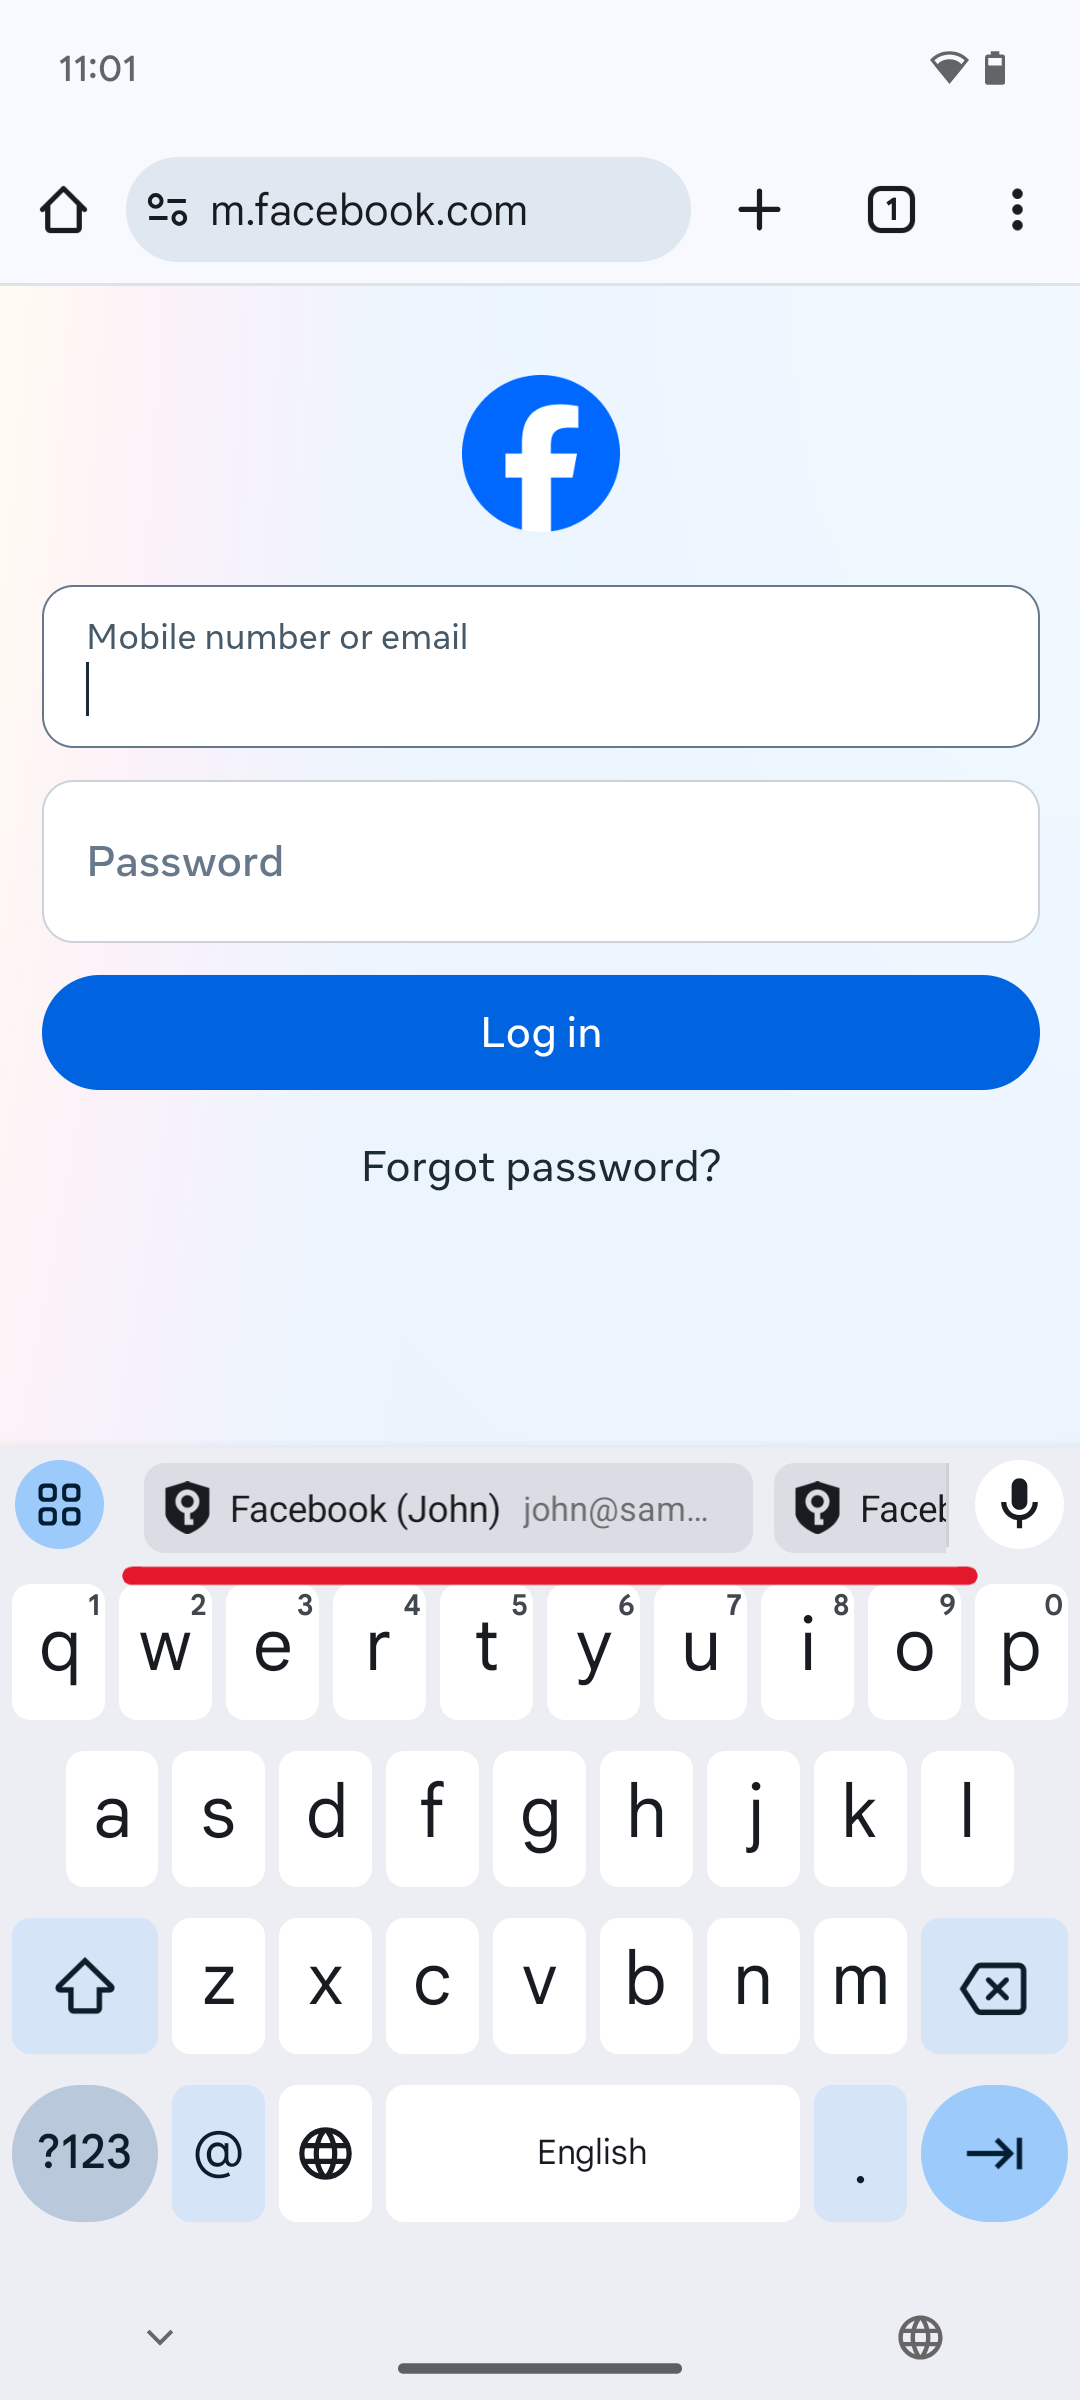
2. When a form appears, the system will automatically suggest autofill options using SafeInCloud (e.g., through the keyboard toolbar or other UI elements):
3. Select the desired card for autofill from the suggestions provided by the system.
4. SafeInCloud will place your username and password in the Chrome input fields.
Troubleshooting
If new method doesn't work try the following possible solutions:
Solution 1
Make sure you are using the latest version of Chrome (version 131 or newer).
Solution 2
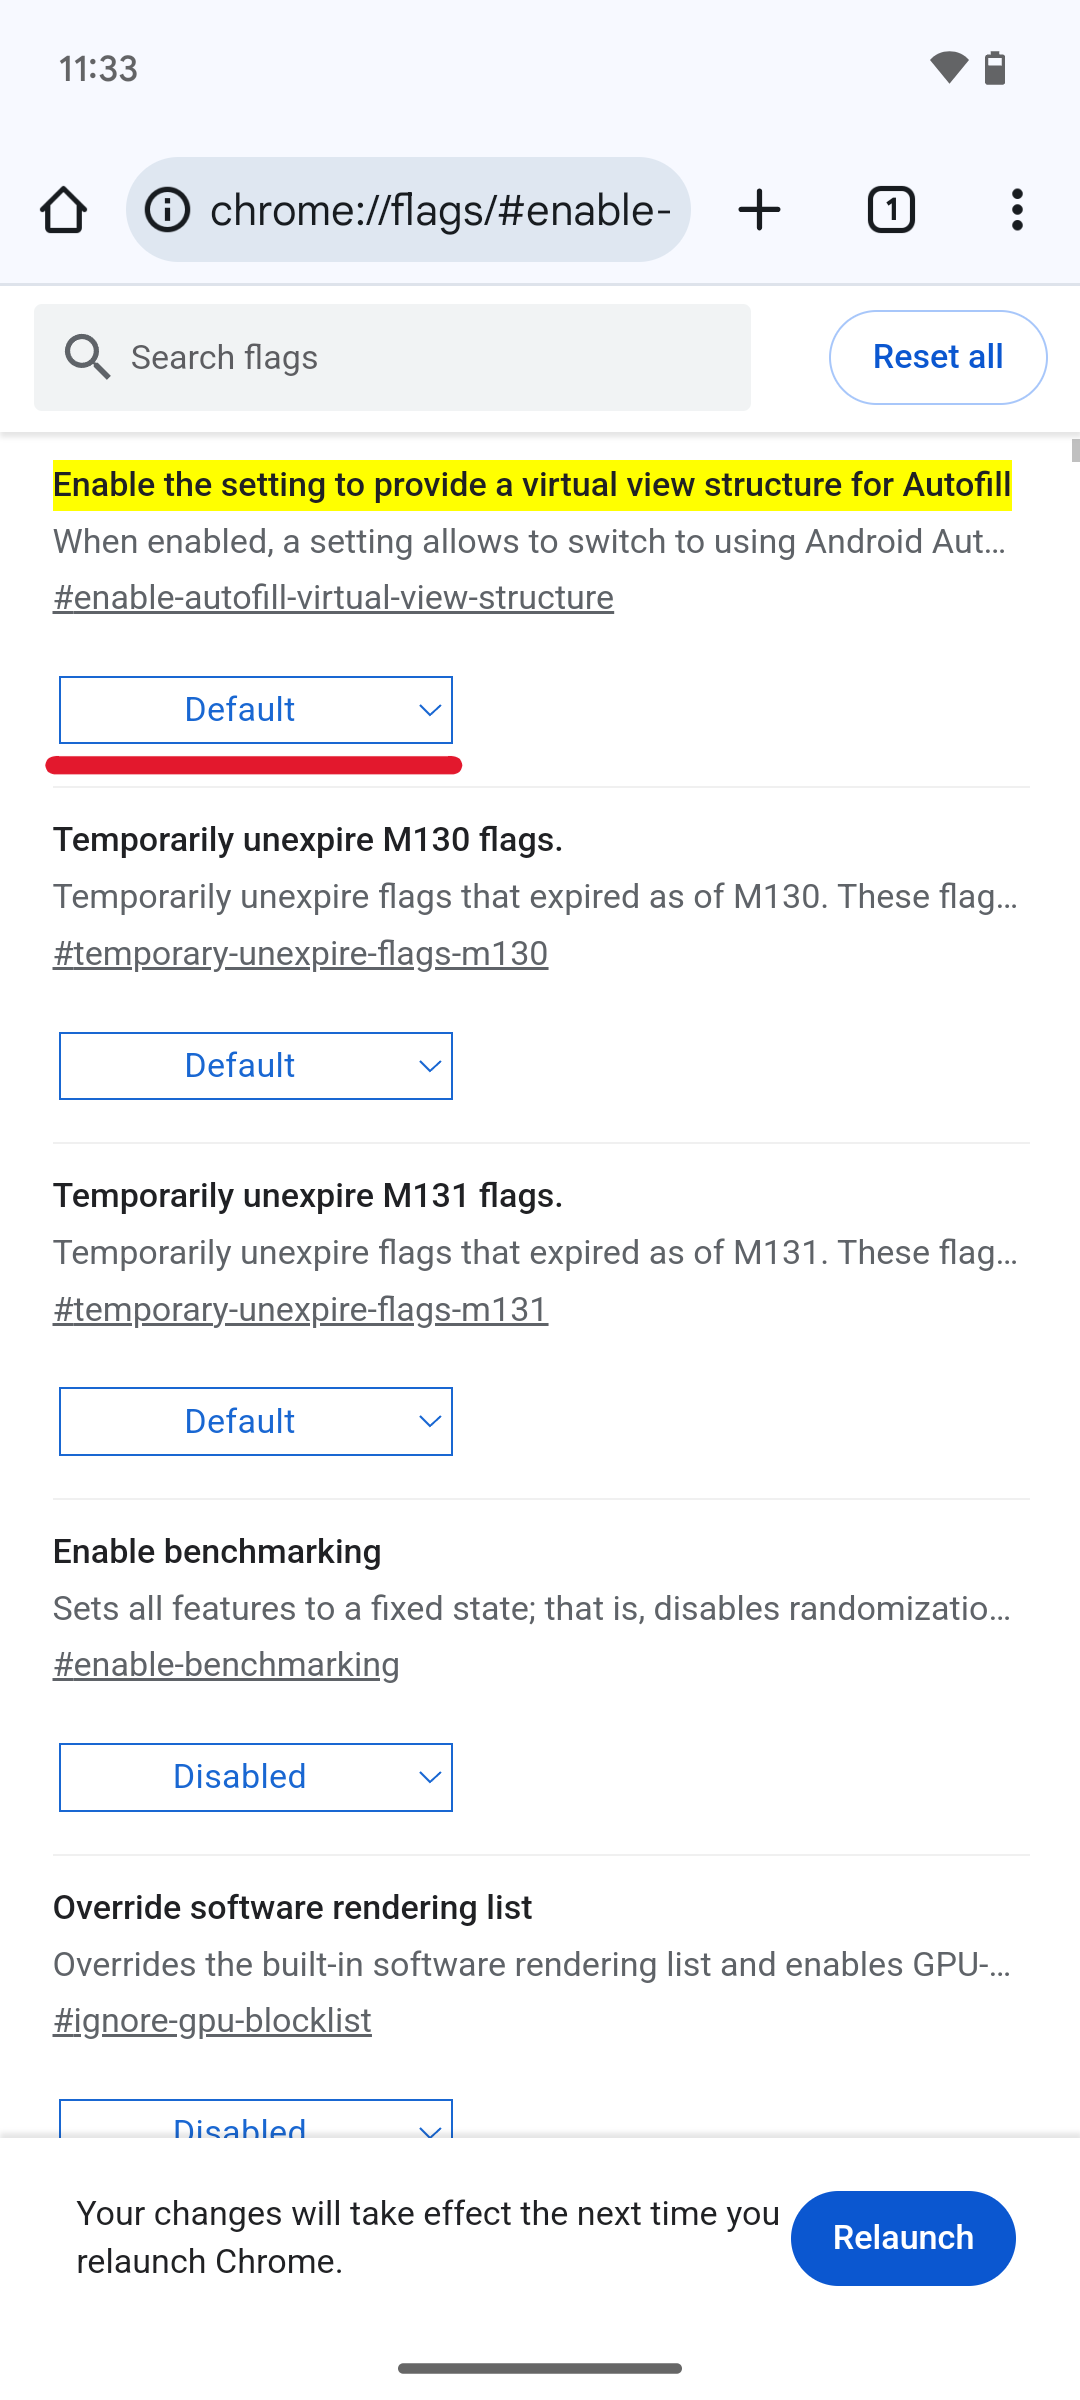
Enable the experimental autofill mechanism by going to chrome://flags#enable-autofill-virtual-view-structure set flag to Enabled, then restart Chrome:
Once flag is enabled, try again to Enable the New Autofill Method in Chrome as described in step 2 of this article.
Solution 3
If no cards are suggested for autofill, ensure that:
Card for the site in your SafeInCloud database contains the Login, Password, and Website fields.
1. Tap Enable in Settings in Autofill in Chrome category.
2. Confirm action in the next pop-up.
3. Tap to SafeInCloud: Autofill in Chrome in Accessibility service.
4. Tap the switch for Use SafeInCloud: Autofill in Chrome.
5. Allow the app access by tapping the Allow button in pop-up.
6. Done! If you have some trouble check step-by-step setup video:
Usage
SafeInCloud offers two quick ways to autofill your logins in Chrome:
Notifications panel
Quick settings
Note: The same mechanism works in most browsers like Opera, Brave, and Edge. However, some browsers, such as Firefox, do not support this autofill method.
Option 1: Autofill via Notifications Panel
Open Chrome and go to a page that requires login.
Look for the SafeInCloud icon in your Notifications at the top of the screen.
Pull down the notification, then tap it. (If needed, unlock the SafeInCloud app.)
A popup with your logins will appear on top of Chrome.
Select the desired credentials, and SafeInCloud will fill them in.
Option 2: Autofill via Quick Settings
Open Chrome and navigate to the login page.
Swipe down from the top of your screen to open Quick settings.
Tap the SafeInCloud icon (it becomes active when Chrome is open). (If needed, unlock the app.)
A popup with your logins will appear on top of Chrome.
Choose the correct login, and SafeInCloud will fill the fields automatically.
Troubleshooting
1. Check Battery Optimization
Some phones use aggressive battery optimization that can block SafeInCloud.
Open your phone’s Settings and search for Apps.
Find SafeInCloud in apps and tap it.
Turn off battery optimization for SafeInCloud or allow background usage (depends on model of your phone).
2. Missing Card Suggestions
Open the card in SafeInCloud.
Ensure the Use for Autofill checkbox is on.
Make sure the fields have correct attributes: User name, Password, Website.
 3. Select the desired card for autofill from the suggestions provided by the system.